Originally posted on October 9, 2010
Continued from The Backyard Office – Part I
Now with the shell of the structure in place, it was time to tackle the interior. I spent quite a bit of time planning what I wanted the finished version of the interior to look like and what features I wanted to support. Adding things to the office (like electrical outlets) is much easier to do when there is nothing but studs on the inside. Trust me, you do not want to have to add anything major once you’ve got the drywall up and finished!
The Framing
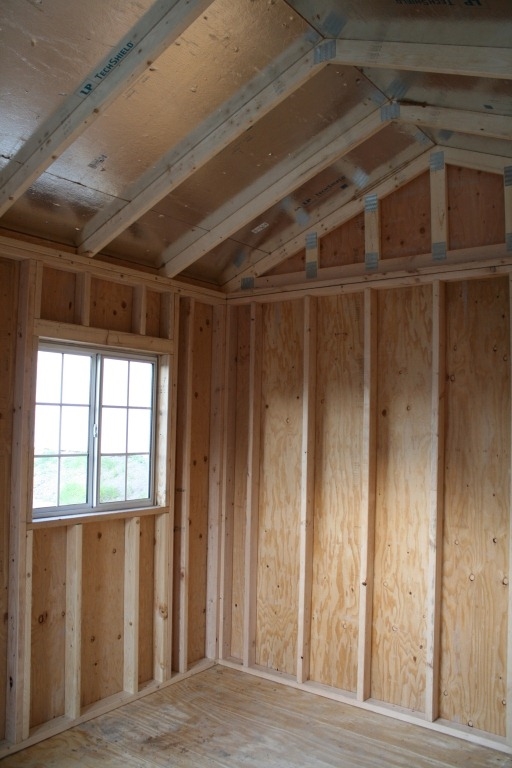 Since these Tuff Sheds aren’t really meant to be finished with drywall and such, not all of the walls were precisely plumb and square. This meant that I would have to spend some time trying to “true up” the existing walls in order to make sure that the drywall would go up smoothly and lie flat. So, using a long 4-foot level I worked my way around the room and planed down any really obvious high spots on the interior walls. It is a time consuming and frustrating process, but it pays to endure this pain up front to ensure a nicely finished room. If I were doing this project again, I would probably not go with the pre-fab building, and just build the entire structure from the slab up. This way I could take my time and ensure that everything is plumb and square. Not that the Tuff Shed was terrible or anything, but it had several areas where a stud or two was close to an inch out of line with the others on the walls…that makes for some undesirably wavy walls (unless you are going for that sort of look).
The only other major task to perform on the walls was to frame out the hole for the air conditioner. With a small interior size of 120 sq. ft., a small window A/C unit would do the trick. Of course I wasn’t going to hang it out of one of windows, so I would have to create a small hole for it. I took careful measurements of the unit in order to plan the size of hole and chose a position high up on the back wall, so it would be hidden from view on the outside and out of the way on the inside. I didn’t cut the hole all of the way through to the outside until I was ready to hang the actual unit.
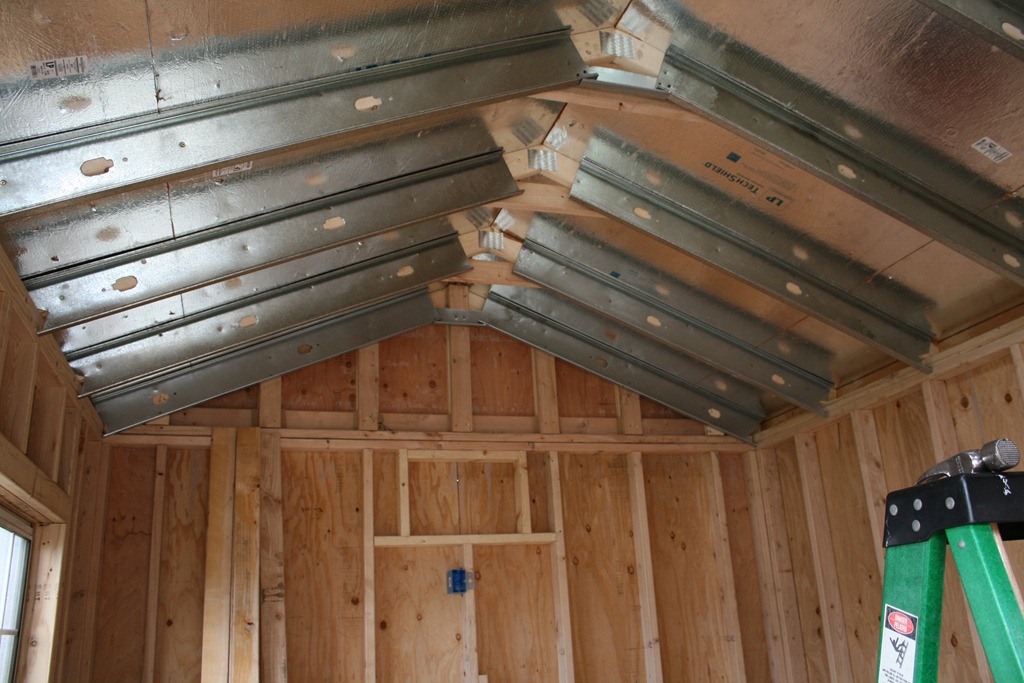
With the walls completed, my attention turned to the ceiling. The ceiling on this model is vaulted with no horizontal supports, which makes for a nice open feeling. The only problem was that it was framed with 2”x4” lumber instead of 2”x6”. This wouldn’t leave enough room in the ceiling to mount any recessed lighting fixtures. My dad came up with the solution of adding some additional 2”x6” beams right along side of the existing 2”x4”s to give the ceiling a bit more depth. Instead of using traditional wood beams (which would have added a bunch of extra weight to the roof structure), we used some galvanized steel 2”x6”s. These were fairly easy to work with, lighter than wood, and are structurally very sturdy.
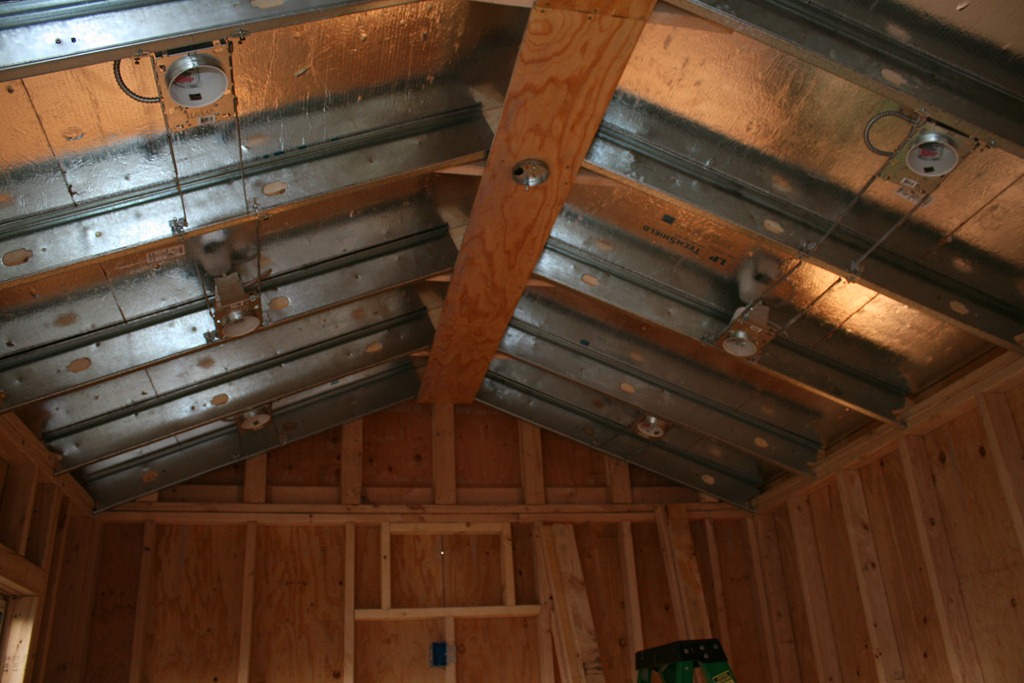
We decided that instead of following the original lines of the ceiling and meeting at a point in the center, we would leave a one foot wide horizontal strip at the high point of the ceiling. This will allow for the flat mounting of a ceiling fan if desired, plus it would make hanging drywall on the ceiling a bit easier. The center where the round electrical outlet was placed, was reinforced with extra framing material so a ceiling fan could be securely mounted. At this point the recessed lighting fixtures were installed. They are affixed to the beams with adjustable metal legs which allows them to be positioned precisely where you want them. Now the structure is “officially” framed.
The Wiring
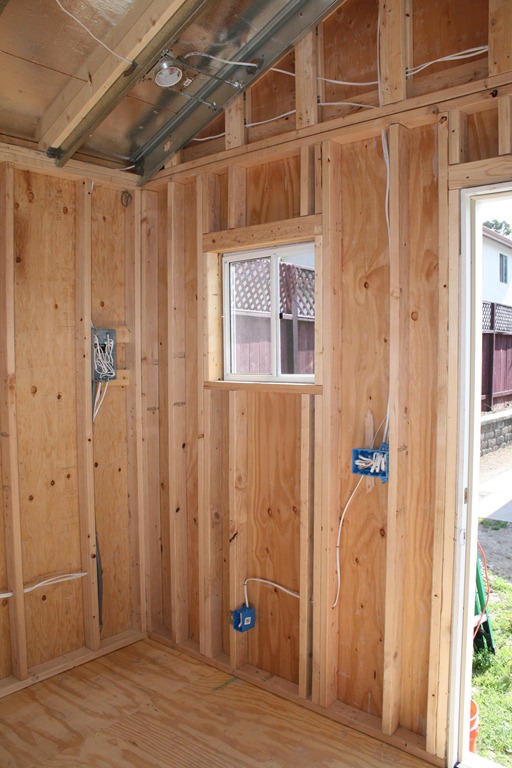
This part of the build took a good deal of forethought and planning. Determining all of the desired electrical outlets, switches, network drops, etc. in relation to where your furniture and devices (computers, TVs, etc.) are going to be placed is very important before beginning the actual wiring tasks. I started by planning where the main electrical connection from the house would enter the structure and mounted a junction box low on the outside wall, with conduit running up in the wall to the circuit breaker. From there individual electrical feeds were ran to the outlets, light switches, and recessed lighting fixtures in the ceiling. Basically, there are four separate circuits emanating from the circuit breaker; A/C, dedicated computer outlet, other outlets, and lights. Drilling the holes and running the wires is very time consuming (especially trying to get them through the corner stud blocks), but planning it all out in advance certainly alleviates the stress of getting it right. Another tip is to label the wires as you put them in (which ones go to switches, lights, etc.), because it could be some time before you get a chance to complete the finished wiring.

At this time I also mounted the in wall junction box for the data side of things (network, video, telephone). It is a Leviton Structured Media box that will serve as the main hub for all of the data connections in the structure. To try and future-proof the wiring, I made sure to run plenty of network cables (Cat-6) and a video drop on either side of the structure. I ran a standard telephone line alongside one of the network drops so I can tie in to the home phone line. The data lines will also come from the house and enter just below the Leviton box. This box will also house the network switch that will take the feed from the house and split it out to the various drops in the structure, so there is also an electrical outlet coming in to the top of the box. This outlet is tied to the dedicated computer outlet next to it. Since the walls are open, I also decided to run speaker wire to each of the four corners and terminating in the back corner (as seen in this picture).
At this point the rough wiring is done, meaning that the wires are in place, but no outlets, switches, network drops, etc. have been wired. The exception is the recessed lighting fixtures, the power to these have all been connected prior to closing up the ceiling.
Insulation
Now that the walls are filled with wires, they are almost ready to get sealed up. I researched quite a few insulation options, from standard pink fiberglass to spray on foam. The spray on foam sounds like a great product, it totally fills every nook and cranny and provides a great insulating barrier. The down side is that it is pretty expensive, so I continued to look for other options before resorting to the pink itchy stuff. I came across a product that is made from recycled denim that sounded interesting, it is called UltraTouch Natural Cotton Fiber Insulation. It provides good thermal insulating, sound absorption, is fire and pest resistant, and doesn’t irritate the skin like regular fiberglass insulation (check the link for complete information). It is only slightly more expensive than standard pink fiberglass insulation, so I decided to give it a shot. I found a green building supply store locally that carried it (Olive Branch Green Building Supply), so I took some measurements and placed an order. One thing to note when picking this stuff up, is that it doesn’t compress very much in its packaging, so the bags that it comes in are huge. It took me two trips to pick up the six bags that I ordered (5.5” thick R-21 for the ceiling and 3.5” thick R-13 for the walls).
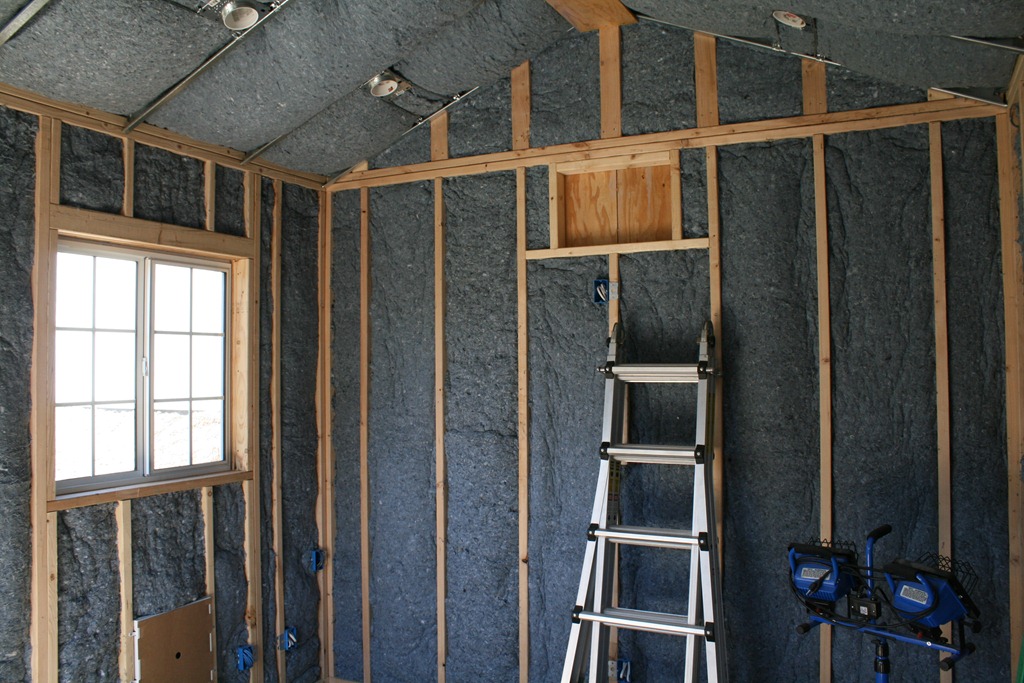 Installing the product is very easy, it is cut in strips 16” wide so it wedges in between the studs and holds itself in place. It even held itself up on the ceiling, at least well enough until I got the drywall installed. You can cut the material with a knife, although it is pretty thick and takes a while to get all of the way through it. You can also just tear it with your hands to make holes for going around outlets and switches. I found that the best way to make large cuts was to use a table saw. I setup my table saw with a fine toothed blade mounted backwards (the teeth pointing in the opposite direction that it spins). This slices through it like butter, but did make a bit of a blue fuzzy mess in the backyard. I am really impressed with the product, it is thick and very dense. It should make for a good sound dampener. Plus, I worked with the stuff all weekend long with my bare hands and it never bothered me (don’t try that with the pink stuff)!
More pictures of the interior steps can be found in the Photos album – The Backyard Office
The project continues in The Backyard Office – Part III
Did you put any air channel/batts behind the ceiling insulation?
No, it was just the insulation to fill the space in the ceiling. It probably would have been a good idea to leave some space between the insulation and the actual roof material to make it more efficient.